How to setup & self-host ERPNext in Docker without Treafik (NGINX only)
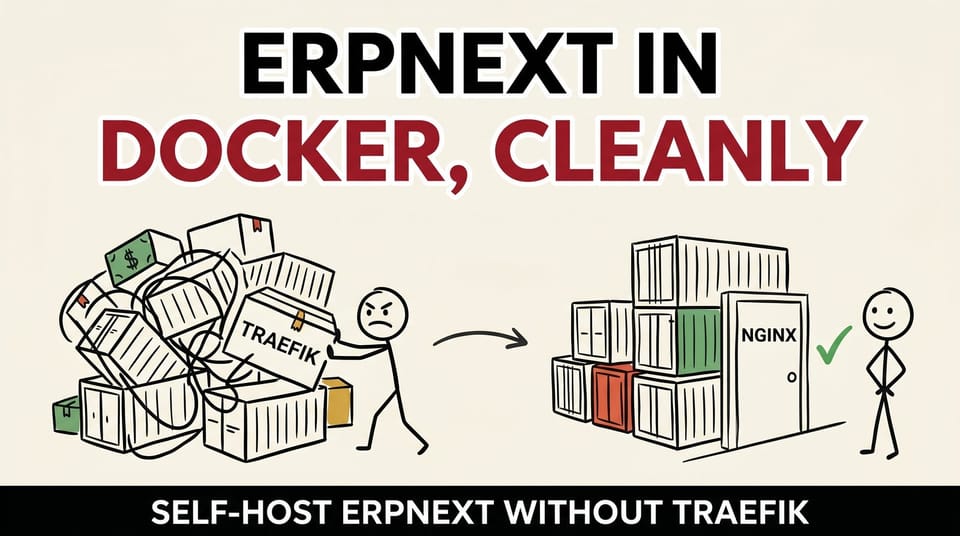
Table of contents
ERPNext is an open-source HR and business management platform that can be self-hosted on-premise both directly and via Docker (and even Kubernetes in K3S or K8S). Though their documentation is 'ok', it's a bit confusing, and it's missing some steps for setup.
To see the original article open the toggle at the bottom of the article titled: ERPNext V13 No Treafik Docker Instructions.
- April 22, 2023: Updated for ERPNext v14 single docker image
- Sometime 2022: Article originally written
Requirements & Warnings
ERPNext is not for the faint of heart; it is a comprehensive system spanning project management, inventory, sales, marketing, crm, document management, hr and more. It requires a good amount of both server and brain-power resources. If you are looking for something simple, ERPNext is not it.
If you are looking for a robust, highly customizable and comprehensive all-in-one type system that is open source, free and that is in active development: then ERPNext is wonderful.
One big, much desired, change from v13 to v14 was moving to a single image that does everything. That's both a plus and minus, but it certainly does make this all simpler to understand. Though there is only one docker image that we'll be using, you do still end up with a minimum of 13 containers (12 if you use a separate database). That's a lot of containers, which is why I recommend a reasonably beefy server to run this.
My experience with ERPNext
We found the system practically flawless, with one tiny exception: email notifications for approved time off. My guess is: The issue was more human setup error rather than a bug in the platform. Everything was very logically setup, straightforward (after a big learning curve) and very well-thought-out. It is truly the most customizable and configurable open-source full-service system we've found.
Though, we ended up switching to simpler services because we didn't need most of the functionality. We realized we wanted something much simpler and less resource intensive.
ERPNext Resource Requirements
The biggest resource spent on ERPNext was the human resource: brain power and time. The system has many modules, lots of documentation and with how customizable: you can get easily lost inside. Between configuring it to be 'just right' and then the day-to-day data we tried to keep in it, it ended up being just too much time for a small business like ours.
Technical requirements
For a production setup, I recommend a reasonably powered server:
- Mid-tier CPU, reasonably new (4+ cores)
- 16gb ram
- 128gb storage
- 1gb network (2gb+ recommended)
- Debian based system
The above is reasonably powerful and would support a mid-sized company with a heavily used system. If we're looking at Digital Ocean, this would be around $40—$100 per month (or more) for the droplet.
You can use the following minimum requirements as a baseline:
- 2core (relatively modern CPU)
- 4gb ram
- 40gb storage
- 1gb network
With DigitalOcean, you could probably get away with using a $20 droplet to start out with.
And of course: you'll need Docker with the docker compose plugin (where the command is docker compose and not docker-compose … but it 'should' work with that older version of docker)
Production—Simple version
There are two ways to get this going, this first section is for the 'simple' version that doesn't require much customization on your part. It's largely set and forget, and it's fine for a production setup on a small scale. I would not recommend this version for a robust nor larger setup (see Product—Customized for more details).
For this version, you do not need to pull the whole frappe/frappe_docker git repo. All you need is the one file (and three folders) below.
Notes
- The original compose file uses a specific version (at the time of writing this, it was version v14.22.2), though here I've made it easier in the major version, so we're simply using
v14(though notlatestbecause I don't trust it) - Be sure to check the bottom of the file for the volume bind mount locations. I prefer to store logs and files I'd like to access easily in the same folder as my deployment files; thus, I've mounted the
logsandsitesvolumes to the location of the folder that has my docker-compose.yml file. - I've also added a network so that all internal containers can talk to each other and only the web container can be accessed by our reverse proxy
- Speaking of reverse proxy: I do not like to expose ports; thus you will not see any open ports here. That's intentional on my part. Only the container that is supposed to “do display” can connect to the reverse proxy. Everything else can only run and connect on the internal secured network.
Simple production setup instructions
1. Create a docker network called erpnext. You are welcome to name it something else, though I name mine after their usage.
`docker network create erpnext`
2. Create the following folder structure, this is to help keep things organized.
/some/path/here/erpnext/
/some/path/here/erpnext/logs
/some/path/here/erpnext/sites
3. Save the following to docker-compose.yml:
version: "3"

services:
  backend:
    image: frappe/erpnext:v14
    deploy:
      restart_policy:
        condition: on-failure
    volumes:
      - sites:/home/frappe/frappe-bench/sites
      - logs:/home/frappe/frappe-bench/logs
    networks:
      - erpnext

  configurator:
    image: frappe/erpnext:v14
    deploy:
      restart_policy:
        condition: none
    entrypoint:
      - bash
      - -c
    command:
      - >
        ls -1 apps > sites/apps.txt;
        bench set-config -g db_passwprd $$DB_PASSWORD;
        bench set-config -g db_host $$DB_HOST;
        bench set-config -gp db_port $$DB_PORT;
        bench set-config -g redis_cache "redis://$$REDIS_CACHE";
        bench set-config -g redis_queue "redis://$$REDIS_QUEUE";
        bench set-config -g redis_socketio "redis://$$REDIS_SOCKETIO";
        bench set-config -gp socketio_port $$SOCKETIO_PORT;
    environment:
      DB_PASSWORD: admin
      DB_HOST: db
      DB_PORT: "3306"
      REDIS_CACHE: redis-cache:6379
      REDIS_QUEUE: redis-queue:6379
      REDIS_SOCKETIO: redis-socketio:6379
      SOCKETIO_PORT: "9000"
    volumes:
      - sites:/home/frappe/frappe-bench/sites
      - logs:/home/frappe/frappe-bench/logs
    networks:
      - erpnext

  create-site:
    image: frappe/erpnext:v14
    deploy:
      restart_policy:
        condition: none
    volumes:
      - sites:/home/frappe/frappe-bench/sites
      - logs:/home/frappe/frappe-bench/logs
    entrypoint:
      - bash
      - -c
    command:
      - >
        wait-for-it -t 120 db:3306;
        wait-for-it -t 120 redis-cache:6379;
        wait-for-it -t 120 redis-queue:6379;
        wait-for-it -t 120 redis-socketio:6379;
        export start=`date +%s`;
        until [[ -n `grep -hs ^ sites/common_site_config.json | jq -r ".db_host // empty"` ]] && \
          [[ -n `grep -hs ^ sites/common_site_config.json | jq -r ".redis_cache // empty"` ]] && \
          [[ -n `grep -hs ^ sites/common_site_config.json | jq -r ".redis_queue // empty"` ]];
        do
          echo "Waiting for sites/common_site_config.json to be created";
          sleep 5;
          if (( `date +%s`-start > 120 )); then
            echo "could not find sites/common_site_config.json with required keys";
            exit 1
          fi
        done;
        echo "sites/common_site_config.json found";
        bench new-site frontend --no-mariadb-socket --admin-password=admin --db-root-password=admin --install-app erpnext --set-default;
    networks:
      - erpnext

  db:
    image: mariadb:10.6
    healthcheck:
      test: mysqladmin ping -h localhost --password=admin
      interval: 1s
      retries: 15
    deploy:
      restart_policy:
        condition: on-failure
    command:
      - --character-set-server=utf8mb4
      - --collation-server=utf8mb4_unicode_ci
      - --skip-character-set-client-handshake
      - --skip-innodb-read-only-compressed # Temporary fix for MariaDB 10.6
    environment:
      MYSQL_ROOT_PASSWORD: admin
    volumes:
      - db-data:/var/lib/mysql
    networks:
      - erpnext

  frontend:
    image: frappe/erpnext:v14
    deploy:
      restart_policy:
        condition: on-failure
    command:
      - nginx-entrypoint.sh
    environment:
      BACKEND: backend:8000
      FRAPPE_SITE_NAME_HEADER: frontend
      SOCKETIO: websocket:9000
      UPSTREAM_REAL_IP_ADDRESS: 127.0.0.1
      UPSTREAM_REAL_IP_HEADER: X-Forwarded-For
      UPSTREAM_REAL_IP_RECURSIVE: "off"
      PROXY_READ_TIMOUT: 120
      CLIENT_MAX_BODY_SIZE: 50m
    volumes:
      - sites:/home/frappe/frappe-bench/sites
      - logs:/home/frappe/frappe-bench/logs
    networks:
      - erpnext
      - nginx

  queue-default:
    image: frappe/erpnext:v14
    deploy:
      restart_policy:
        condition: on-failure
    command:
      - bench
      - worker
      - --queue
      - default
    volumes:
      - sites:/home/frappe/frappe-bench/sites
      - logs:/home/frappe/frappe-bench/logs
    networks:
      - erpnext

  queue-long:
    image: frappe/erpnext:v14
    deploy:
      restart_policy:
        condition: on-failure
    command:
      - bench
      - worker
      - --queue
      - long
    volumes:
      - sites:/home/frappe/frappe-bench/sites
      - logs:/home/frappe/frappe-bench/logs
    networks:
      - erpnext

  queue-short:
    image: frappe/erpnext:v14
    deploy:
      restart_policy:
        condition: on-failure
    command:
      - bench
      - worker
      - --queue
      - short
    volumes:
      - sites:/home/frappe/frappe-bench/sites
      - logs:/home/frappe/frappe-bench/logs
    networks:
      - erpnext

  redis-queue:
    image: redis:6.2-alpine
    deploy:
      restart_policy:
        condition: on-failure
    volumes:
      - redis-queue-data:/data
    networks:
      - erpnext

  redis-cache:
    image: redis:6.2-alpine
    deploy:
      restart_policy:
        condition: on-failure
    volumes:
      - redis-cache-data:/data
    networks:
      - erpnext

  redis-socketio:
    image: redis:6.2-alpine
    deploy:
      restart_policy:
        condition: on-failure
    volumes:
      - redis-socketio-data:/data
    networks:
      - erpnext

  scheduler:
    image: frappe/erpnext:v14
    deploy:
      restart_policy:
        condition: on-failure
    command:
      - bench
      - schedule
    volumes:
      - sites:/home/frappe/frappe-bench/sites
      - logs:/home/frappe/frappe-bench/logs
    networks:
      - erpnext

  websocket:
    image: frappe/erpnext:v14
    deploy:
      restart_policy:
        condition: on-failure
    command:
      - node
      - /home/frappe/frappe-bench/apps/frappe/socketio.js
    volumes:
      - sites:/home/frappe/frappe-bench/sites
      - logs:/home/frappe/frappe-bench/logs
    networks:
      - erpnext

volumes:
  db-data:
  redis-queue-data:
  redis-cache-data:
  redis-socketio-data:
  sites:
    driver: local
    driver_opts:
      type: none
      o: bind
      device: /full/path/to/yourcontainerfolder/sites
  logs:
    driver: local
    driver_opts:
      type: none
      o: bind
      device: /full/path/to/yourcontainerfolder/logs

networks:
  nginx:
    external: true
  erpnext:
external: trueThis version is not recommended for production. For that, please use the customized version below and use a properly configured .env file.
From the Frappe Docker Github, copy the "example.env" and move it (rename it) to .env and edit your variables (such as site name and database details). See the customized section below for a bit more info. This .env file should be in the same folder as your docker-compose.yml file.
4. Pull the images. I prefer to pull images before running them, thus from the folder (path) where you saved this new docker-compose.yml file run:
docker compose pull
5. (Optional) To ensure everything runs, run in interactive/command line mode and NOT daemon mode. This way, you can easily stop all the containers with cmd-c or ctrl-c:
docker compose up
6. If all runs well (it WILL take a while to deploy fully), then you can shut it down and run it normally:
docker compose up -d
7. Point your reverse proxy (that is on the same docker network) to the container named frontend on port 8080.
Note: your container may spin up named as erpnext-frontend-1 depending on your docker compose setup. This is due to the way docker compose automatically names containers that don't have a unique name set.
8. Run the following command in console to initialize your first "site" in Frappe ('site' here meaning the website as associated with a domain and brand):
docker-compose exec backend bench new-site --no-mariadb-socket --mariadb-root-password --admin-password
For further modification, please see their deployment docs that talk about further (and thus manual) configuration.
(direct link: https://github.com/frappe/frappe_docker/blob/main/docs/site-operations.md#setup-new-site)
 frappe
Production—Customized
As the title of this post states: this article is all about running ERPNext without Traefik … which, sadly, their customized option includes. Or at least if you try reading their docs and overrides initially. The following steps work around the need to Traefik and therefore let you use whatever reverse proxy you'd like.
Three final notes before we get to the instructions:
- There is an option to use Postgres, this article does not cover that.
- All notes from the simple version apply about volumes, ports, and networks.
- You do not need to pull the full repo, though it does make it easier to work with. If you'd like to save some space, simply download their
overridesfolder andcompose.ymlfile.
Customized Production Install
1. Create your folder where all your files will live. Be it by pulling the full repo or by making your own (see folder step in the simple version).
2. Copy example.env to .env and customize it.
A few important items to remember to customize are:
- Let's Encrypt email, though you can probably remove it since ERPNext won't be handling SSL (our external reverse proxy will)
- Database configs (or remove them), such as setting a proper password
- SITES. Important note, this config line MUST include the backslash --> ` <– that little guy. See the config file for how they have the url in there. The site url must be enclosed by single back quotes.
- Remove the REDIS lines if you're using the built-in stuff
- ERPNext version. I recommend changing it to
v14rather than something likev14.22.2
3. Build your docker-compose.yml file using the docker compose config generator/compiler tool. To achieve this, select which overrides you'd like to use so that it's perfect for your system.
Since we're avoiding Traefik and using mysql / mariadb, we'll be adding the overrides to use the correct networks and 'overrides' to configure our final compose file. Important: this command needs to be run from the same directory where your compose.yml and overrides folder is so that it can use the files correctly.
docker compose -f compose.yaml -f overrides/compose.noproxy.yaml -f overrides/compose.mariadb-shared.yaml -f overrides/compose.redis.yaml config > docker-compose.yml
This will generate a final docker-compose.yml file for you in the same directory. You are welcome to use different paths if desired.
4. Open the generated docker-compose.yml file to customize it further. In this step, you'll want to do what we did with the simple version: add internal networks, add named volume bind mounts and remove ports.
(I'll admit I've gotten a bit lazy in writing this article, thus look above for how I added networks, removed ports and customized mounts)
5. Pull the container(s):
docker compose pull
6. (Optional) Bring the containers online so you can see logs:
docker compose up
7. Bring the containers online in the background / daemon-mode:
docker compose up -d
8. Point your reverse proxy to the named containers. Most likely, the container will be named erpnext-frontend-1 if you didn't name it in the config file.
Further customization options
The nice part about ERPNext is that there are only 5-ish core containers: backend, frontend, queue, site creator and configurator. All others are supporting services. Therefore, you can bring your own Redis instance and your own database.
Refer to the official documentation for further docker-compose.yml configuration:
frappeThough oddly, there aren't many environment variables we can touch:
frappeFinal words of caution
I highly recommend not running the latest tag for the frappe/erpnext image. It seems like it's a dev image. Far too much can go wrong with such builds, especially in production.
Ensure that you're using the correct image. The GitHub repo for ERPNext points to the old docker image container on Docker hub. Here is the correct link to the correct image:
To keep management easy, I recommend using the major version for the image tag rather than the full version image tag. Though, if you'd like more control, there's nothing wrong with using specific version numbers. :)
ERPNext V13 No Treafik Docker Instructions
In this article I will show you the settings, setup files and steps needed to get ERPNext hosted on your hardware without Treafik.
Why without Treafik? Simple: I don't need it, nor want it and I already have a well configured reverse proxy I use for everything, so I don't need yet another tool doing the same thing and causing conflicts.
A few important notes about my setup here and general important notes:
- While I use it in a production-like environment, I am NOT too picky about perfection.
- I used the built-in database setup instead using an existing sql setup. Why? I was lazy. You may remove the MariaDB container here and use your own if you wish, I simply didn't due to laziness.
- I changed the default ports because I have things already running on the original ports suggested.
- Frappe's original docker-compose file did not include port settings for NGINX, and their documentation says NGINX will use port 80. It does not. It uses port 8080, thus I've set up port forwarding to that.
- Also not documented by them (at least no where where I saw), erp-next worker (the
erpnext-pythoncontainer) should have port 8000 (container side) available as that's what 'serves' the data to their nginx (which serves it to the public) - In my current setup, I used a specific ERPNext version. They, for some odd reason, initially put using
edgeversion which is, what we call here in the business tech world ... a "Bad Idea (tm)". That version rarely worked and we had a lot of problems with it. Use a stable release. Such asstableorv13or what I did, I use a specific version:v13.16.0. Though I'll be soon changing to use thev13branch to stay up to date. - Use reasonably long but not too long passwords for admin and mysql. Also do NOT use special characters. Someone smarter than me can probably explain, but using special characters and long passwords has always broken setup for me when using docker compose. So, in this setup I've used 27 character long passwords with numbers and letters only.
- I did NOT setup my own docker network for this. Meh. I let Docker & Portainer handle that automatic network creation for me when I did all this through a Portainer stack.
- The docker-compose.yml and .env files have been edited and slimmed down by me in-order to get rid of Treafik and make them work for us.
- You may have to specifically open up the ports on your server so that this will all run.
- In our setup here, we are using an external reverse proxy, so this current setup will NOT work and will NOT be accessible directly. You WILL have to wrap it in reverse proxy in-order to access. In this case we had an existing NGINX centralized and working.
- And yes.... this means you will have TWO NGINX setups ... one here in this docker setup which does the site 'serving' and then your own NGINX (or other reverse proxy) to wrap it in a domain so you can actually access it.
This setup will start eleven (11) containers. One container is there only to initial the system initially and do that kind of work. The container site-creator will do it's work and then end (stop itself). This is a-ok. Assuming all works well on launch for you, this container will run and depending on your server it will take a while to do the initial setup and migrations. Give it a good while.
First, here is a working ERPNext docker-compose file (docker-compose.yml):
New GIST with both the docker-compose.yml and the .env file:
https://gist.github.com/PiotrKrzyzek/825c15149251ffc44d13de2ad677fbd3
[Above also includes] a slimmed down ERPNext env file you can use (in Portainer you can add them line by line or use the advanced editor button when creating a stack to just copy-paste this in after making your changes)
Quick note about the .env file: the 'SITES' variables HAS TO have the url in back quotes ==> ` <<==
Toss the above into a Portainer stack or via command line, and it'll set itself all up. Of course, change the emails, passwords and url's and ports as needed for your own unique setup.